

Drill Battery Shop > Battery Blogs > How to Rebuild Power Tool Battery Packs
![]()
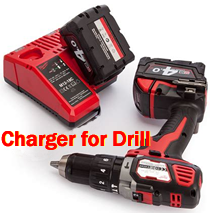
Once the battery pack of your cordless drill bites the dust, there are several things you can do. Seeking replacement batteries sounds like a good idea until you realize they are pretty expensive or even hard to find. You can also opt to relinquish the whole tool and label it as of no service to you.
The better way to get your favorite power tool back in action is to rebuild its battery packs. Rebuilding means replacing the pack's weak or dead rechargeable battery cells with new hi-capacity cells. The practice reconditions the Milwaukee M12 battery packs to new strengths that enable your cordless drill to go the distance.
Rebuilding battery packs tend to be a widespread practice among contractors and DIYers since it is pocket-friendly and delivers a higher power rating for the rebuilt battery than the original batteries. Further below is a stepwise process elaborating how you can carry out this remedy.
This is the step that you equip yourself with all the tools and materials necessary for rebuilding. Here's a list of the necessities to get you started;
When choosing new cells for battery rebuild, you have to be explicit with your choice. For clarification, you can obtain one of the original cells by unscrewing and pulling the pack's top off. What you need to do is to obtain the essential cell specs.
Start by taking measurements of the single cell. Typically, most cordless drills use Sub C size cells. Taking note of the mAh rating of the dead batteries is of the essence. If you wish to obtain more details of the old batteries, you can look them up online.
The information you obtain from the above should guide you when purchasing new cells. The baseline is, settle for cells with a discharge rating of 5C or above. You can also choose cells with a higher mAh rating than the original ones, provided you are ready to spend more.
Another momentous consideration when procuring new cells is the design. It is highly recommendable to choose those with the tabs already welded in place. That said, let's get right onto the actual rebuilding as discussed below.
Start by prying the battery pack open. The original battery pack should serve as a template by providing a layout to follow when arranging the new cells. It would be best to place the original Milwaukee 48-11-2402 tool battery pack on a piece of paper and trace its outline with a marker for reference purposes.
Make markings of the position of the terminals (both the negative and positive terminals) on the drawn outline. Arrange the new cells on the trace on a flat surface corresponding to the markings.
Using the old pack as a guide (follow its pattern), lay out the polarity and solder tabs in a likewise direction. Employ a hot-melt glue gun to glue the cells together.
With the cells glued together in a pattern similar to that of the old pack, it is time to solder all the connections. For safety reasons, you should clamp a heat sink onto the tabs before introducing heat to protect the battery.
Then, use a rosin-core solder to solder the tabs together. Repeat this process with the extra rows/groups of cells. Remember to carry out soldering in a meticulous way for a perfect outcome.
The transfer is carried out by disintegrating the original terminals from the original pack and soldering them on the new pack, respectively. Also, the insulators and the temperature sensors from the old pack should be transferred and set up in the plastic case.
You are almost through. Set up the rebuilt Milwaukee M12B3 drill battery pack in the casing. It should sit in without a hassle since the layout is similar to that of the older pack. Re-fix the terminals into their respective positions on the casing and close the plastic case. Remember to charge it and test it out. It should turn out excellent.
![]()